Sweep the surface, pre-rinse with a garden hose, scrub with a cleaning solution, rinse again, and let everything dry completely. That covers most deck cleaning situations.
The rest of this post also covers the trickier parts: mold, stubborn stains, pressure-washing mistakes, and what changes depending on whether you have wood or composite boards.
Everything You Need Before You Start
| Item | Purpose |
| Broom or leaf blower | Clear loose debris before wetting anything |
| Garden hose | Pre-rinse and final rinse |
| Pressure washer (optional) | Faster cleaning with the right nozzle |
| Fan tip nozzle | Spreads pressure wide to prevent surface damage |
| Stiff deck brush | Scrubbing along the grain |
| Bucket | Mixing your cleaning solution |
| Dish soap or deck cleaner | General grime and buildup |
| Spray bottle | Spot treating stubborn stains |
| Gloves and goggles | Protecting yourself from cleaning agents |
1. Clear the Deck, Then Pre-Rinse
Move all furniture, planters, and grills off the surface. Sweep or use a leaf blower to remove every bit of loose debris, including whatever has packed itself between the boards. Once the deck is clear, run your garden hose over the entire surface.
The pre-rinse softens surface grime, protects nearby plants from runoff from cleaning solution, and keeps your cleaner from absorbing into hot, dry boards before it has time to do anything useful.
Pressure Washing Tips To Keep In Mind

A pressure washer cleans faster than hand scrubbing, but it also causes more accidental damage than almost any other tool when used carelessly.
Here’s where people go wrong and what to do instead:
- Using a pencil-tip nozzle rather than a wide fan tip, which concentrates pressure and can gouge wood or permanently score composite boards
- Getting too close, since keeping the wand at least 12 inches from the surface keeps the pressure spread safely across the boards
- Spraying across the wood grain instead of running the nozzle along the length of the boards
- Skipping the pre-rinse, which means you’re pushing dry debris down into gaps rather than flushing it away
Fan tip, moderate pressure, steady motion along the boards. That combination is both fast and safe.
2. Choose The Right Cleaning Solution
For wood decks, warm water with a few drops of dish soap handles routine maintenance well. If you’re prepping for a fresh stain or dealing with heavy gray buildup, a dedicated deck cleaner opens the wood grain more effectively.
Composite decks are more forgiving. Warm soapy water and a soft-bristle brush cover most situations. Avoid abrasive cleaners or anything acidic on composite surfaces, and work in small sections, rinsing as you go.
If you’re weighing the long-term maintenance costs of the two materials, our post on composite vs. wood decking breaks down the full comparison clearly.
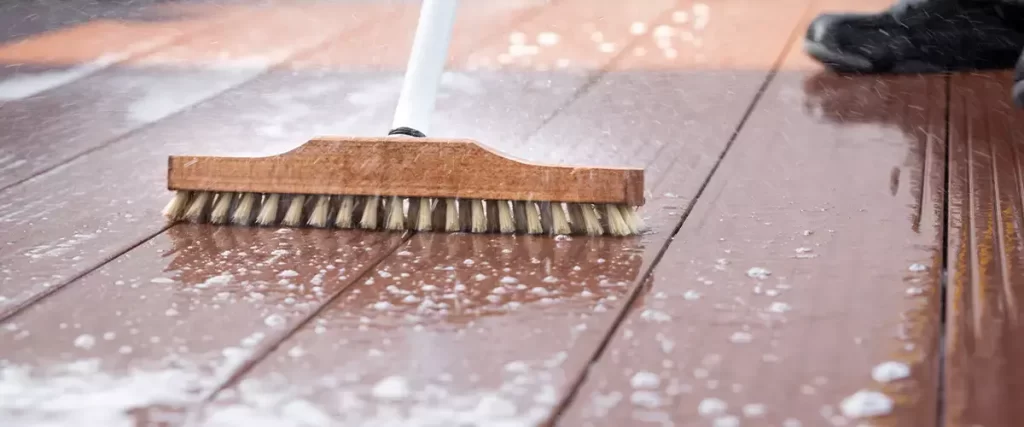
3. Scrub Along the Grain, Always
Apply your solution and let it sit for a few minutes before touching the brush. Then scrub with your deck brush, always working along the length of the boards.
On wood, going against the grain raises wood fibers and leaves a rough, uneven surface once everything dries, which is the opposite of what you’re trying to accomplish.
Work in small sections so the solution doesn’t dry on the surface before you’ve scrubbed it. Four to six feet at a time is a comfortable pace.
4. Deal With Mold and Mildew
Mold grows in shaded corners where moisture sits and doesn’t get much sun. The EPA’s guidance on mold cleanup points to moisture control as the real, lasting fix. So, clean the visible growth first, then figure out why that area stays wet after rain.
For wood decks, an oxygen-bleach solution mixed per the product instructions works well without degrading wood fibers over time. On composite surfaces, a mild soap solution or a manufacturer-approved cleaner handles light mold without risking the finish.
One important note: the EPA advises against routinely using chlorine bleach for mold removal and specifically warns against mixing bleach with ammonia-based cleaners, as the combination produces toxic fumes. Read the label on anything before combining it with something else.
Apply your solution, let it sit for 10 minutes, scrub, and rinse the deck surface thoroughly.
5. Let It Dry Completely
After cleaning, give the entire deck at least 24 to 48 hours to dry before applying any sealer or stain. Sealing over moisture traps it beneath the surface, causing bubbling, peeling, and early wear. Don’t rush this step.
A quick test: sprinkle a few drops of water onto the boards. If they bead up and sit there, it needs more time. If they absorb right in, you’re ready.
Frequently Asked Questions
How often should a deck be cleaned?
Once a year, typically in early spring, it keeps most decks in solid shape. Decks under heavy tree cover or with high foot traffic often benefit from a second wash mid-season.
Can a pressure washer damage composite decking?
Yes, with the wrong setup. A fan tip nozzle at moderate pressure, with a safe working distance, is fine for composite decking. High-pressure pencil-tip spray can leave permanent marks or dull the surface finish.
What’s a solid homemade cleaning solution for wood decks?
Warm water and a small amount of dish soap handle routine cleaning. For mold or heavy gray buildup, oxygen bleach mixed per the product’s instructions is more effective and gentler on wood fibers than chlorine bleach.
Do I need to clean between the deck boards?
Yes. Debris packed between boards holds moisture and is typically where mold takes hold first. A putty knife or stiff brush clears the gaps, and a garden hose flushes what’s left behind.
Some Decks Need More Than a Good Scrub
Sometimes cleaning a deck is the first step, and the second step is realizing the boards are past saving. Warped wood, failing boards, or a structure that needs attention are problems that need solutions beyond dish soap and a brush.
If your deck has reached that point, or a new build has been on your mind for a while, the team at Decks On Point builds fully custom decks across Westfield, Noblesville, Carmel, and the wider Indiana area, all licensed, insured, and backed by a lifetime warranty.
Take a look at our deck building and design services to see what the full process looks like, or reach out directly. Call us at (317) 903-2431 or message us here.